How to Create Accounts in Badger Maps (Android)
1. On the Badger Maps home page, click the Accounts icon found at the bottom of the screen.

2. Tap on the blue plus sign "+" that appears at the lower right side of the screen.

3. You'll be taken to the Create Account screen.

4. Fill out the information (Account name and address are required.).

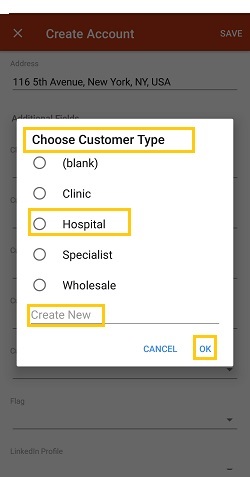
5. Tap on any of the Custom Fields to fill them out (This is optional.). Choose from the pop-up list and click OK. You can also tap Create New to add a new filter under the specific field.


6. Your newly-added account will now appear on your account list under the Accounts tab.

You can also create an account using our Pin Drop feature. Click here to find out how.
Here's a video tutorial on how you can create and edit accounts in your Badger account: