How to Remove Routed Accounts from the Map
Removing routed accounts from the map is quite easy with the help of the Visualize tool’s Filter function. There are just a few things that you need to do first.
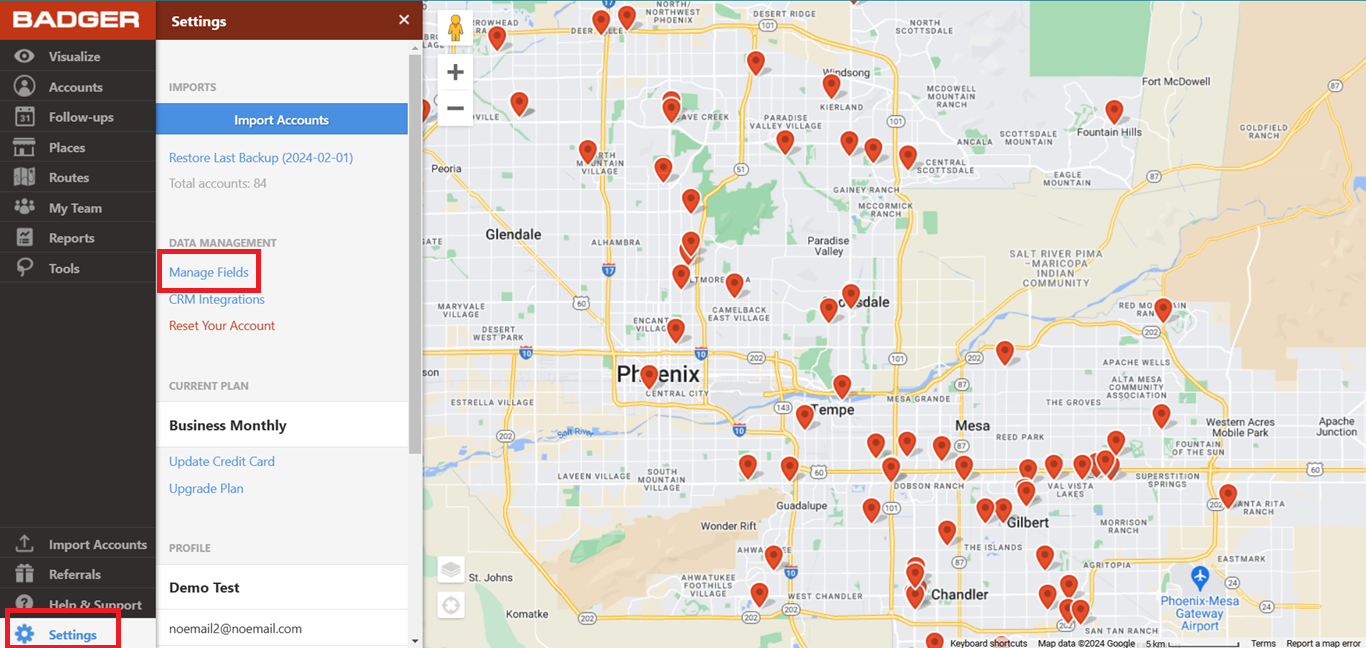
1. Log on to the Badger Maps web app, go to Settings, and click Manage Fields.
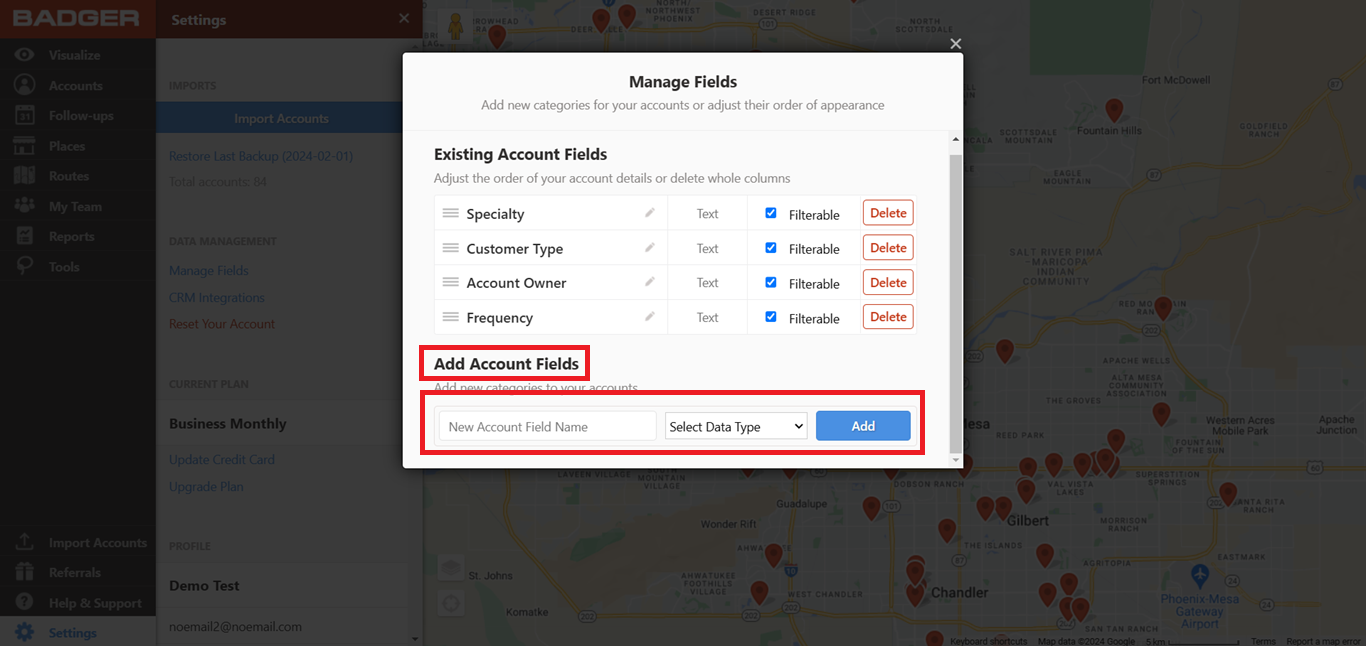
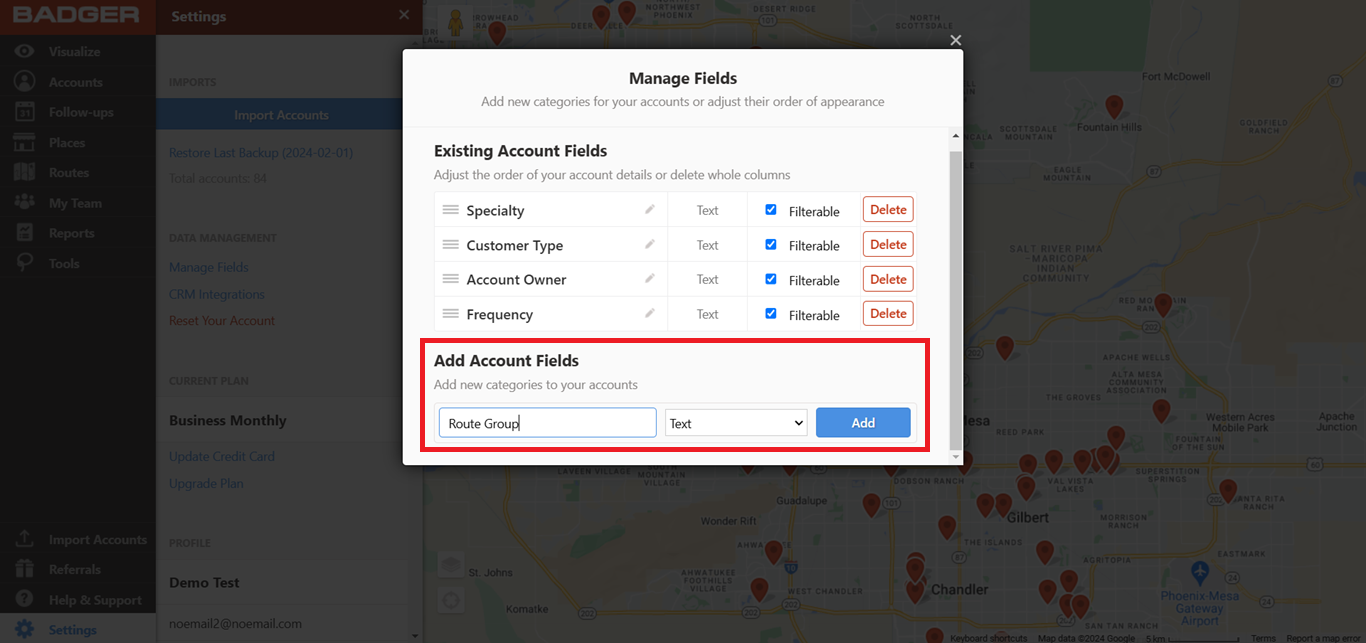
2. Then look for Add Account Fields, type the field name (Route Group for example) on the New Account Field Name box, select Data Type, and click Add.
3. After creating the field, go back to Routes, click Saved Routes, and load a saved route.

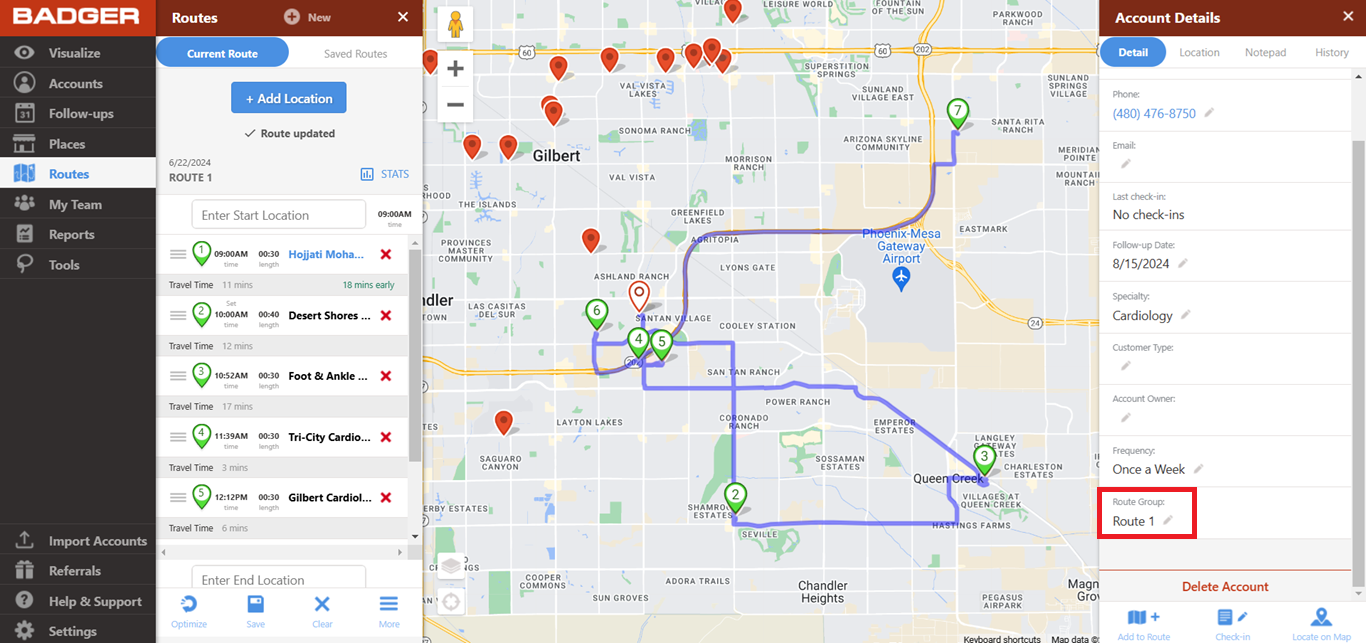
4. After that, you’ll be taken to the Current Route screen. Click one of the accounts in your route to open up the Account Details. Then look for Route Group, and click the pencil icon.

5. Type the route name, and click Add to label the stop accordingly. Do the same for the rest of the stops.

6. You can also mark the accounts even before creating the route by using the Mass Update function under the Lasso tool. Click here to learn how. Also, click this link if you want to know how to build a route using the Lasso tool.
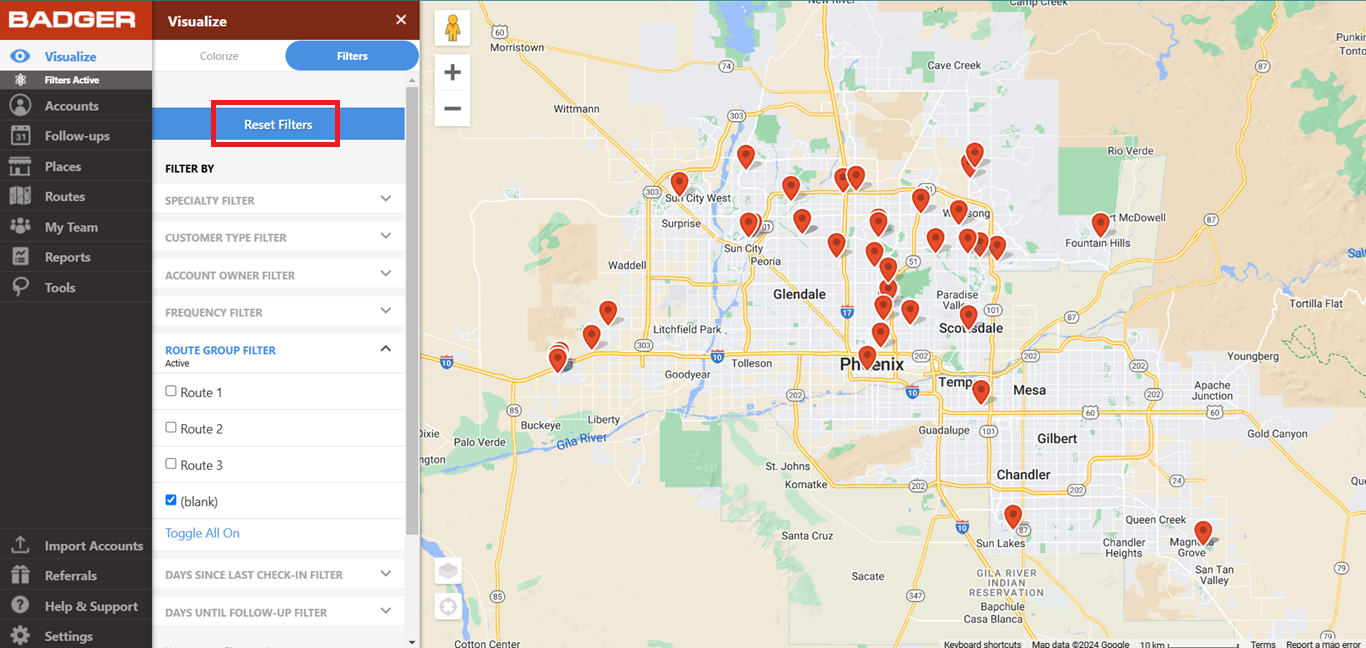
7. Once the accounts have been labelled accordingly, go to Visualize, click Filters, and look for Route Group Filter.

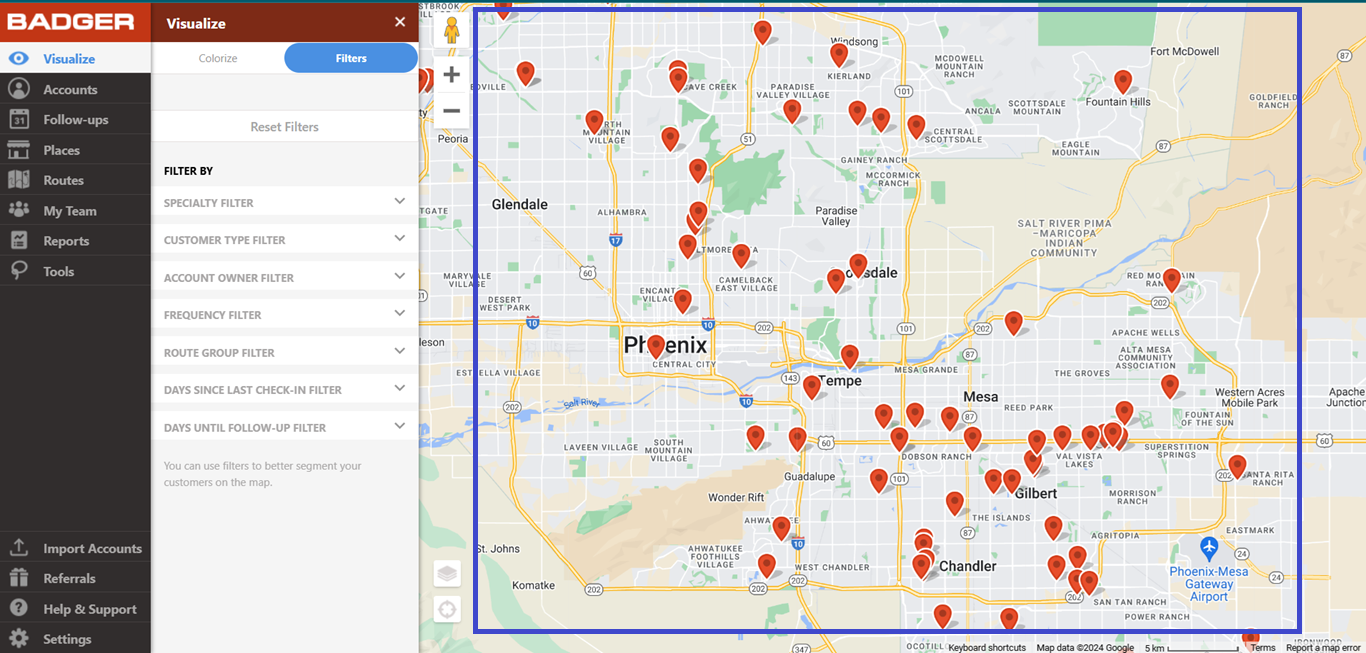
8. Toggle off everything except (blank). This action will only show the accounts that do not belong to any route. If you want to bring back all the other accounts, just click the Toggle All On or Reset Filters button, and they’ll appear on the map once again.


And that’s it. You just learned how to remove routed accounts from the map. Go ahead and try it out. Click here if you want to learn how to color code your routes. Happy routing!